During my cleanup the other weekend I found this old Logitech Marble Mouse among my collection. I have used this in the past and I vaguely recollected that it was fairly nice to use. To see if that was still the case I have been using it at work for the last week or so. To see how I've been getting along with it follow along after the break. I must say that it is really nice to use. This is quite important when you're sitting at your desk for most of the day nearly every day. However there is one feature that is conspicuous by it's absence. There is not built in way to scroll. Thankfully it has 4 buttons not the standard 2 which means that with the help of X Mouse Button Control I have configured the 2 small buttons to handle scroll and center click. This works great in almost everything. However the scrolling in Internet Explorer leaves something to be desired.
With a little research I discovered that this is caused by smooth scrolling that is enabled by default on my computer. To turn it off, first open the Internet Options dialog.
Then open the Advanced tab.
Scroll down the list until you find Use smooth scrolling. Uncheck this box then close out with OK. Congratulations, you now have turned off smart scrolling and your computer will become a little more usable.
If you have any other tips or tricks for standard or non-standard mice post below in the comments and let everyone else know.
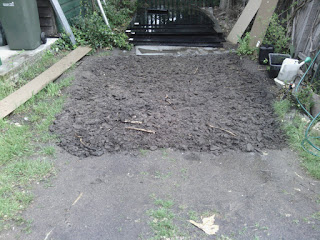
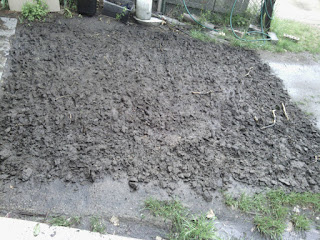
I got some good work done on improving the flora at home today. The driveway where I had been parking the Jeep has pretty much completely lost any grass cover it had. Also any water that had been getting on it has pretty much been running straight off. To help reduce this hydrophobic effect I have turned over to soil to about half a shovel blade. This is as far as was easy so I am going to leave it there for now.
Once I'd turned it all I watered it as much as I could for now. Currently the rain in finishing the job somewhat. The plan is to keep water up to it for the next week. Then next weekend I'll turn it again, but this time turn through some manure to help improve the soil and make it easier for grass to grow again. Then I'll keep water up to it for the next week and if there hasn't been any grass start to grow, I'll turn it again and then buy a bag of seed. From then on it should be just looking after it like any new lawn.
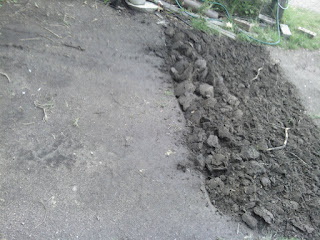
This was how it was about 1/4 of the way in. As you can see it went from being solid, reasonably packed, to big clumps, then I broke it down further to much smaller pieces. As the grass begins to grow I'll keep updating here.
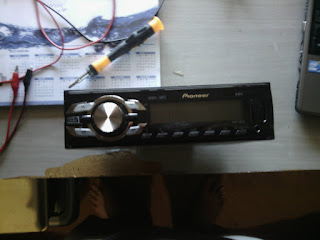
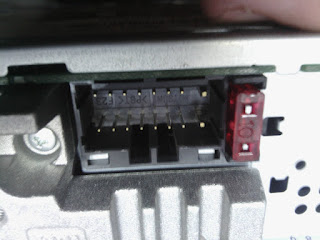
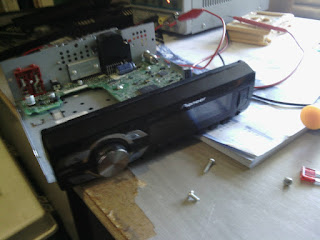
I have been cleaning up over the last few days and among the stuff I found this car stereo in my collection. Now my brother has some issues with the stereo in his car so I figured that seeing as I don't have an immediate use for this one I could probably pass it on if it worked. Follow on after the break to see how I tested this head unit to see if it was worth using. This was where it got interesting as I don't have the harness that's needed to connect this unit to the car.
This was all I had to work with. Thankfully I managed to find a website that has the actual pinout of this connector in the back rather than just what wire does what; which normally would be very helpful but unfortunately not here.
One of the fist things I did was to open it up and give it a quick sniff and look for anything obviously burnt out. I did manage to connect this to my car using a Kenwood cable that fitted. But going by the blown fuse it wasn't wired right. Thankfully there weren't any burnt traces or components so it should be ok.
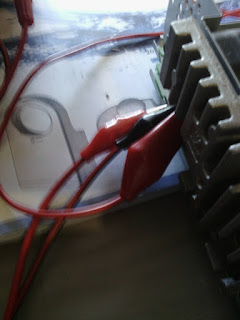
Using the pinout from pinoutguide linked above I managed to connect my bench supply to the battery +ve, battery -ve and ignition pins. I need to connect to the ignition pin otherwise all I can do is remember the radio presets and not actually turn it on. Thanks to my somewhat large and oversized alligator clips I actually connected both the ignition and the illumination pins. This is ok, as the illumination pin just lets the radio know how bright the dash is so it doesn't blind the driver.
Plugged it in and.. it works. Now at this point you can't try and play something as there are no speakers connected and that can blow final drive transformers. Probably not a big deal with a smaller unit like this, but still a good habit to get into I think. Besides this unit and many other basic audio devices use a single chip that does all the audio heavy lifting. If that was damaged I would probably either be able to see it, smell it or the device wouldn't function in any sensible form.
Over the next few weeks we'll probably do a quick post on how we install stereos or head units into cars. But until then now you know how to test a head unit that's been sitting in the back of your cupboard for a few years and you don't want to spend anything on if it's cactus.
A huge thank you to my brother today, without whom the Jeep would still be parked in Mum and Dad's driveway with a line missing. As I have been a bit unwell the last few days
As you can see from the photo it is in a new spot. Actually nearly the same spot we first saw it in on this blog. Which is rather fitting as this is likely going to be the last we see of it as I am now looking for a new owner so I can focus on other projects that will take me in the direction I am hoping to be travelling. Particularly this dinghy that is still waiting for a trailer to be built. Which will probably be happening sooner rather than later as it is warming up nicely, providing good motivation for getting it mobile and sailing.