This was all I did, the spindle is quite loud so I didn't want to be running this too late. I'm not quite sure what kind of plastic this was but I did get a fair few pieces of what seems to be Delrin that I will be experimenting with once I work out how to hold them as the chuck doesn't open far enough to hold them.
This machine is fairly old and is controlled from a 486 running windows 95. Not the world's oldest machine. But fairly old. The interface is all DOS based so to improve startup time I have disabled the windows GUI entirely and just boot into DOS. The interface, while definitely classic it isn't too hard to use or hard on the eyes, which can be a problem with some of these older user interfaces.
I shot a video of me machining this piece with my phone sitting on top of the safety shield. During the video you can hear the different pitches as I adjust the speed of the motor to see if that would change the finish. Watching the video and also while using the machine there is a lot of backlash evident in the Z axis so I will try to work out what is causing that and hopefully remedy it.
With this now working I should be able to power the spindle for the mill from the accessory port on the control box for the lathe. This will give me a chance to fully test and even start using it to make parts.
I have the manuals for this lathe so I will probably put together a program that will allow me to turn down the Delrin blanks so I can mount the securely in the better chuck. But we'll see about that.
Cheers,
Rex
- Details
- Written by Rex ORegan-2
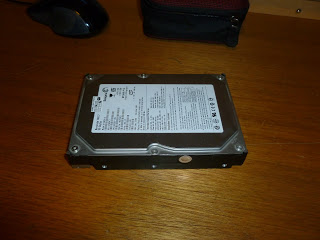
This is where we start, It's an older IDE drive that I could probably use in one of my machines, but I have given in to the SATA cables and now I have a very hard time justifying why I should be keeping a drive that needs a ribbon cable, so I won't.
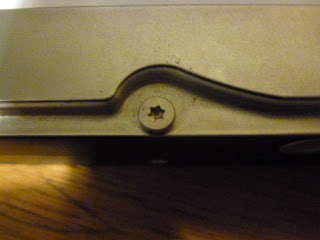
These are what hold the top on. These are just a normal Torx T8 screw. If you buy a small toolkit from Jaycar or many other electronics hobby stores you will probably find it includes some of these.
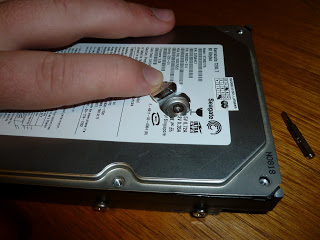
There's a sneaky one here hiding under the label. Make sure you unscrew it because otherwise no matter how hard you try, that top isn't coming off.
Once all the screws are out just prise around the edges with a screwdriver or another fairly thin tool.
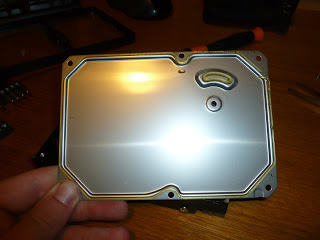
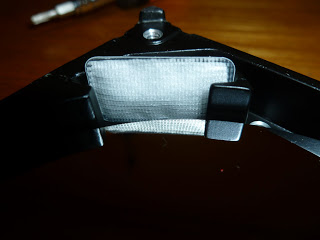
The top should come off fairly easily after that, if not look for more screws under the label. (Ask me how I know.) If you look closely you can see there is a bead of some kind of semi flexible sealant around the edge of the lid. This is to keep air and more importantly dust out. These drives are assembled in a cleanroom type environment as any particles can significantly reduce the life and reliability of these.
Some drives do have a vent in them. Those that do always have some kind of filter over the vent to keep contamination out of the drive. The vent is required as during operation the internals of the drive change temperature. This causes the air inside to expand and it needs somewhere to go, otherwise it may damage the case.
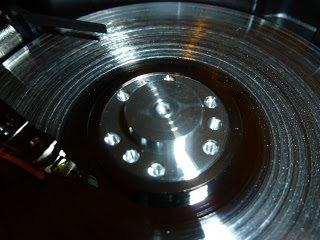
Here we can see the interesting parts of the drive. The big silver disk is the platter where the data is actually stored. The metal arm that is pointing to near the center of the platter is the read/write head. The very end of it floats on an air bearing when the drive comes up to speed. If the air bearing fails for whatever reason the head can crash into the platter which can cause scratches and other damage.
This is a short video I put together of me destroying this Hard Disk. Don't watch if you have strong Hard Drive sympathies.
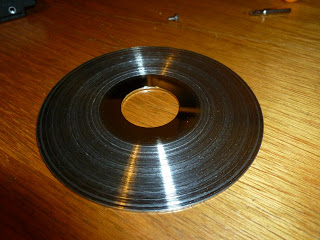
For anyone who doesn't want to load the video this is what the top of the platter looked like after machining it with a screwdriver bit.
I don't think anything is going to be recovered from this drive. But to be sure I'm going to be keeping a magnet on top of it and moving it occasionally, just to be sure.
If there's anything else you want to see inside and/or tortured like this drop a not in the comments and we'll see what I can do.
Cheers,
Rex
- Details
- Written by Rex ORegan-2
This is something that I have struggled with on various projects over the years, is it safe? What will others think of me doing it? Whatever the case may be. On the instances when I have put these fears into their place by stopping and working out just what the impact will be, then after putting into place safety controls I have always found these projects to be worthwhile. This one today is one of them. Here was my problem:
The controller for the CNC Lathe runs on 110V not the 240V that comes from the walls here. When I got the machines I had a few cords that would connect them to a transformer box so they could be used with a 240V wall supply. Unfortunately I have lost said cables and to be able to run the Lathe I need to get 110V to it. Bugger.
This is where fear came into it. From the time I have started playing with electronics there has always been an unspoken rule that you just don't have anything to do with line voltage as a hobbyist. This is a very safe rule. However in this situation it would've stopped me from being able to run the lathe again unless I found the power cord (Unlikely). So after taking stock of the risks (electrocution) and working out controls (unplug and leave for a while to let any charge dissipate, test to make sure nothing is shorted to the case before re-connecting) I realized that this could be fixed safely.
And here's the finished product. I can now use a normal power cord like I would use for a computer to power the lathe with 110V.
That's where the scaryness happens. The transformer is potted in epoxy so that's all quite solid.
Looks like I'm not the only one who chain drills and doesn't fully clean up the edges. I had to take off some of the peaks before the new socket would go on.
Testing all of the connections. I'm using an old analog multimeter on ohm reading to check for shorts. It does still work, certainly well enough to show a short circuit.
That's all for today, the next post will be my 100th post on this blog so I am working on something cool for that so stay tuned.
And remember, don't let your fears tell you that something can't be done. There's always a safe way.
Cheers,
Rex
- Details
- Written by Rex ORegan-2
I had the lab power supply out to see if I could run the spindle off it. However even with the knob for current all the way up it was still getting limited so I think that's going to be a no-go. The good news is that I can still run it from the accessories port on the Lathe control box because I haven't gutted it yet.
It's a little bit dirty but not too bad and with the shield shut then there shouldn't be any issues with bits getting into the rest of the room which is good considering this is above my servers.
Here's the interface I am using for now. I'm hoping to get Machineface/Cetus/mkwrapper working so I can use any computer to control this, but for now I'm connecting with a VNC connection because mkwrapper doesn't seem to like being run in such a way as it can be accessed from outside that computer.
Finally, here is a short video I took while I was making sure everything still worked. I still need to set the maximum speed and tune the acceleration for each of the axies but I will get to that eventually. You can hear that when it's set right it's nice and smooth. But otherwise it sounds like somethings grinding.
Cheers,
Rex
- Details
- Written by Rex ORegan-2
Page 22 of 46


