
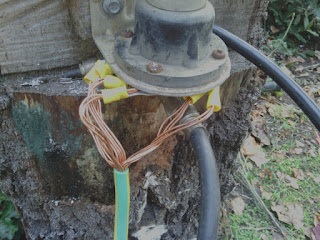
This is my completed attachment to the bolts that hold on the insulator at the base of the bracket. Check it out after the break to see how I got to this point.
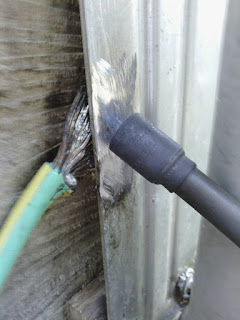
I'm glad to see you're interested. So to start with I was still trying to solder the copper wire onto the aluminium bracket. One though I had was that it might not be sticking to the aluminium much because of the oxide layer that it gets. So I got my grinder out and cleaned it up a bit. I did just use the normal grinding disk that was already in the tool. I know these can get gummed up by aluminium but I was only skimming a little off so it wasn't a problem, thankfully. So here is a picture of what it looked like after cleaning it up a little:

However that wasn't working for me with electric irons so I figured I'd get some more heat onto the job. Enter a propane torch borrowed from Dad. With that going this is what things looked like:
So at that point I decided to take a break, unfortunately without a kit-kat, and read the instructions that I had been given. Now the first page of these has a large area where the ink got lifted off or something at one point but it was still readable on the sides. So reading what little I could I discovered the "Fig.5" showed how to connect an earth. Upon looking at "Fig.5" It seemed to indicate that the bolts at the base were for earthing and sure enough when I looked there was a bit of wire wrapped around one of then and a fair bit of galvanic corrosion and a lot of white slightly powdery aluminium. So I cleaned that up with the grinder again and crimped on some connectors, added some brass washers, then put everything back together again.
I do apologize for the lack of pictures in this post, but sometimes there's nothing we can do with the technology we have.
Cheers,
Rex